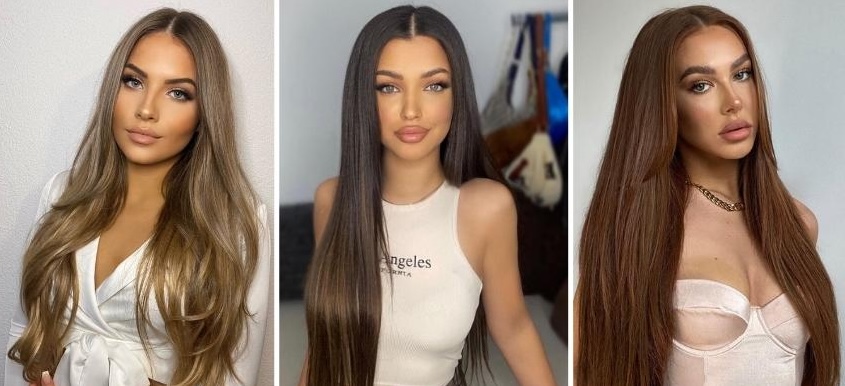
Tape-in hair extensions can be quick to apply, comfortable, and gentle on your hair compared to other methods. They are also a cheaper solution, as we can reuse the same set multiple times instead of purchasing new extensions every 6-8 weeks. Tape-ins are lightweight and cause less damage to your natural hair, allowing for stylish variations without discomfort. You can easily wear them confidently, even in high ponytails. Since you have chosen them over other options, the question that arises is how to reuse tape in extensions. For those curious about reusing tape in hair extensions, it is indeed possible with proper care. If you maintain it well, you can smartly reuse the tape in extensions up to three times. This affordability and practicality make tape-in hair extensions an appealing option for individuals looking for a low-maintenance way to improve their hairstyles. This guide will detail how to clean, retape, and reapply tape in extensions smartly, both at the salon and at home. Your tape-in will deliver a fresh look while extending its lifespan and maintaining quality.
How many times can you reuse tape-in extensions?
If you want to add length and volume to your hair, tape-in hair extensions have become an increasingly common choice. They are lightweight, flexible and give off a natural look when worn correctly. Still, a common query is: How long do tape-in extensions last? Many people have concerns about the procedure, yet are keen to extend the life of their hair extensions. Several factors, including quality, maintenance, hair growth, and frequency of use, affect how long tape-in extensions last. Here is what you can anticipate in how to reuse tape in extensions. First, before you need to reapply, Tape-in extensions must be taken out and put back in every 6 to 12 weeks. Each Remy human hair extension needs approximately 2-3 refits. The extensions move away from the scalp as your natural hair develops. This process requires repositioning of your tape-ins. The process is also referred to as a “reapplication” or “refit.” Additionally, the overall lifespan of tape-ins depends on how they are maintained and how frequently they are used. High-quality tape-in extensions, especially those made of Remy human hair, can last up to three years, if properly cared for. But you will need to change the adhesive tape on every refit appointment.
What you need for retaping
To keep the extensions looking smooth, you might need to reposition or re-tape them as your natural hair grows. It will be very difficult to remove the glue if tape-in hair extensions are left in place for longer than the anticipated maintenance cycle. Retapping tape-in extensions is generally recommended every 4 to 6 weeks. By doing this upkeep, you can keep your natural hair from being pulled and weighed down by the extensions. It is therefore necessary to re-tape if the extensions become uneven or the tape begins to come free. Retaping tape-in hair extensions might seem intimidating, but it is a simple process that can preserve your extensions if done correctly. Here are some of the supplies you would need for easily updating those extensions. First things first: assemble your materials. You will need an adhesive remover solution before anything else. Then, to get a firm grip, you will need new adhesive tape made for hair extensions; double-sided replacement tape for extensions is recommended. Sectioning clips and tail comb to avoid any harsh tangles. Along with some isopropyl alcohol wipes or remover to remove any leftover tape residue, a pair of scissors will also be helpful. The estimated cost for all the essentials lies between GBP15 and GBP30.
Step-by-step: removing old tape
To preserve the health and integrity of your natural hair, removing tape from hair extensions demands accuracy and the appropriate equipment. Tape-in extensions must be adjusted as your hair grows, often after 6 to 8 weeks. This requires a trained hairstylist. Your stylist will gently remove the extensions using tools and a specialised tape-in remover solution. This prepping method is essential for reapplying tape in extensions. Here is a step-by-step technique to help you understand how to remove old tape.
Step 1 – If you want to know how to take the old tape off the extensions. It is the first step in refitting a tape-in extension. To gently remove each tape weft, you will need an adhesive remover. The remover is specially designed for tapes. By doing this, the connection is loosened without harming your natural hair. This procedure should take 30-60 seconds for the solution to dissolve the tapes. You must wash your natural hair after removing all extensions to remove any remaining glue residue.
Step 2 – Now, since the tapes have been removed, it’s time to peel the wefts. When the extensions are removed, use a tail comb to carefully comb through the natural hair. This will help in comfortably removing any remaining glue. This stage guarantees that the hair is untangled and silky. Use an alcohol solution to clean the wefts and keep them dirt-free.
Additional tip – Your stylist is responsible for properly cleaning and preparing your extensions for retaping if you intend to use them again. Your stylist will advise how to keep them until your next session if you don’t want to refit them immediately.
Step-by-step: applying new tape
We will start by briefly explaining how tape-in extensions function. Your natural hair is sandwiched between two wefts prepared with tape. This strengthens the connection with the extensions and improves their lifespan. Here are a few more steps involved.
Step 1: Preparation – Prepping is an important step when considering tape-in extensions refit. Neglecting these steps may result in poor adhesion and loss of extensions. The first step is to thoroughly clean the workspace and tools with 99% Isopropyl Alcohol to remove any oils or residues. This is followed by washing hands to prevent transferring natural oils onto the tape or extensions. Subsequently, both the wefts and your hair should be washed with a bond-breaker shampoo to remove residues that could interfere with adhesion. All tools and products must be readily accessible. The installation process requires handling items with one hand while working with the other. Additionally, it is recommended to pre-apply tape to the wefts by placing the non-weft-facing side of the extension on a comb handle to make transitions between sections easier. After these preparations, the installer is ready to begin taping in the extensions.
Step 2: Sectioning – The second step is sectioning off. Start from the bottom and decide where you want to start. Make sure there is a clean, straight horizontal line beneath the area of hair that needs to be sectioned off.
Step 2: Taping – The sectioned hair should be held high. Now, place the comb with the extension on it. Press the weft in place with your finger when the comb and extension are positioned as desired. After that, roll the comb off the tape.
Step 3: Clipping – Lift any hair that did not adhere to the tape once the weft has been pushed into place, then clip it up with the remaining hair. The second tape extension can be placed on top of the first tape and pressed firmly for 10-15 seconds, once those hairs have been removed. Test that the tapes are evenly aligned. This is necessary because they can break apart and fall out more readily if they are not aligned.
Step 4: Heating – You may use some heat to assist in the bonding. Using a flat iron is the most successful approach for this. Lightly and quickly press the tapes between the flat iron. To avoid melting the tape or burning the wefts, don’t push on them for too long or too forcefully. Finally, wait for 48 hours before washing.
Salon refit vs DIY: which is better?
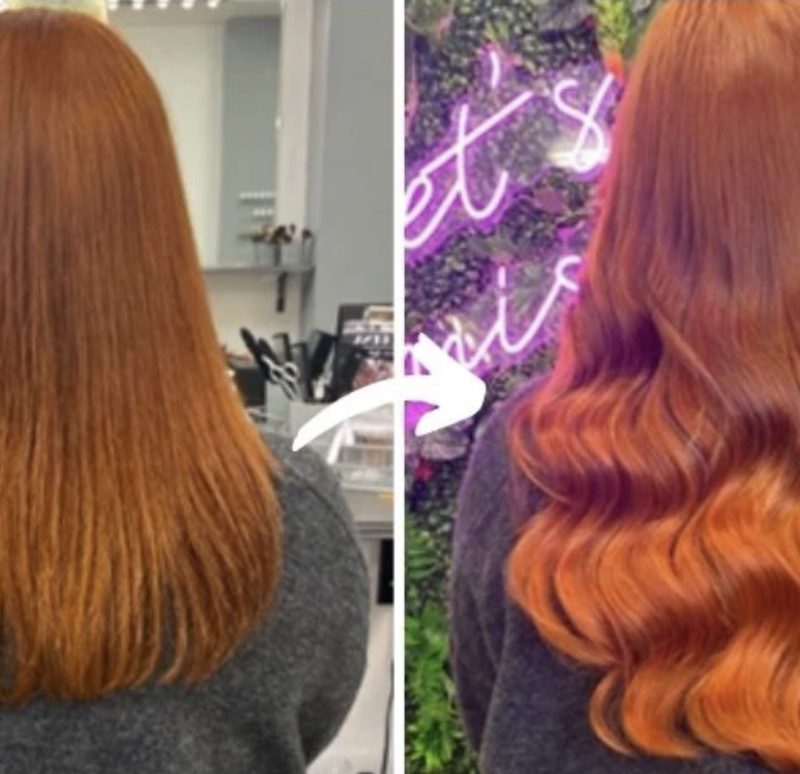
When you are new to extensions, a professional installation offers several benefits over DIY kits for tape-in extension refit. While DIY hair extension kits may seem affordable, they range from GBP15 to GBP30. DIY hair extensions are risky, such as improper application, damage to natural hair, and a shorter lifespan of the extensions.if tape ins are incorrectly applied, they lead to improper placement, which can also result in noticeable lumps or awkward gaps. Additionally, applying extensions incorrectly can cause tension on hair follicles, leading to breakage and traction alopecia due to poor attachment. In comparison to DIY, professional installation helps in safety with trained specialists utilising proper techniques to securely attach extensions without harming natural hair. They also use high-quality materials designed for individual hair types, such as 100% Remy human hair, which is more durable and aesthetically pleasing than the low-quality options found in DIY kits. The cost ranges from GBP80 to GBP150. You can also look for Customisation, a key advantage of professional services. Specialists assess clients’ hair and recommend the best type, colour, and method for their specific needs. This guarantees a smoother blend with natural hair. Your professionally installed extensions can last longer and will require less frequent maintenance, with clients receiving expert advice on aftercare to maintain the look and integrity of their extensions. Overall, DIY options are enticing, but opting for professional hair extensions guarantees better results, safety, and longevity.
How to store tape-in extensions between wears
Because human hair extensions need to be cleaned before being stored again, they require a few extra steps. You know, it is probably not the best idea to store them when they’re unclean. Therefore, if they have a lot of product buildup, you should wash them with a premium shampoo and conditioner suitable for extensions, and either let them air-dry or blow-dry them on low. Lay them flat on a non-sticky surface so that they can be tangled and dried easily. Folding and bending wefts result in diminishing the set. Remember, storing them in cool or dry places will improve their longevity. After they have dried, use a tail extension brush to make them smooth and silky. They can now be safe until the next time you wear them.
Many people have concerns about how to reuse tape in extensions, yet are keen to extend the life of hair extensions. Rest assured that hair extensions only require reapplication every 6 to 8 weeks if you prefer not to reuse the tape. Your hairdresser can reapply your hair extensions as needed, as long as they are maintained. Your tape hair extensions can last up to a year if you take good care of them and store them away from moisture and sunshine. To extend their life, proper storage and care are essential.
Article edited by Karl Webber